Tuesday, January 31, 2012

The Pause That Refreshes

Taking a break from construction for a bit

A quick progress update:

Metallikahmish Bay now has a pizza parlor, fire station, passenger depot, two factories, a slaughterhouse, a switch tower, a social club, two bridges and a train viaduct/elevated railway

The Port Pacific part of the railroad has been put off for a future extension, with the entire layout now dedicated to Metallikahmish Bay

Bunch of fun stuff left to do!

General Scenery:
  • Top off the mountain 
  • Add a tunnel portal on the west side of the mountain
  • Add a detailed tunnel liner with access windows to fix derailments
  • Clean up the layout and put everything away that isn't complete at least to the "detail" level
  • Scrape off the glue and foam bits, fill a few small holes and cut away the rest of the foam where the harbor will be
  • Paint the harbor with a first coat of midnight blue/dark blue and let it serve as a placeholder while construction on the city and mountains continues
  • Final painting of the harbor will be the last step when the rest of the layout is done.  Several coats of high gloss will then be applied as the final finish
The City:
  • Build the grain terminal
  • Build the concrete mixing plant
  • Build the tabasco sauce plant
  • Build SNAKKO 
  • Build a team track with an operating crane that reaches to the harbor 
  • Build barges, a ferry, a fireboat and a tug
  • Build all dockwork, boat launches and pilings
  • Build the arched drawbridge on the west side of the harbor
  • Superdetail all buildings
  • Repaint and re-stripe all roads
Rolling Stock:
  • Customize all vehicles
  • Paint the Santa Fe diesel and caboose for the MB and Port P RR w/ Cascadia Flag markings
  • Buy two additional locomotives and cabooses and do the same for MB and Port P RR
  • Buy two additional locomotives and cabooses in CP Rail paint
  • Buy a second full passenger steam train and detail in WPAT paint
  • Detail the existing passenger coaches in Great Northern paint
  • Add weight to all freight/passenger cars
  • Detail some of the freight cars with graffiti paint and decals
  • Buy a few dummy locomotives for lashups in CP Rail, GN and MB & Port P RR markings
  • Detail some of the freight cars in MB & Port P RR markings
  • Detail other freight cars in WPAT markings
  • Detail still more freight cars in the logos of the businesses on the layout
Train Table:
  • Add backdrops
  • Add a switch to the northwest corner of the layout for future expansion
  • This switch will have a curved siding that runs through the tunnel toward the east side of the layout.  The end of the siding will meet up with the Port Pacific extension - meaning the extension will have two tracks that connect to the original layout
  • Finish adding profile boards and paint them
  • Add and detail the control panel
  • Add pads on all for corners
  • Clean up and label all wiring
  • Add the remote throttle and cable for walkaround control of one locomotive 
Downtown Metallikhamish Bay:
  • This is a "maybe" at this point.  If I don't build this the area will just be covered in scenery
  • Add a narrow plateau above the tunnel with a forest/mountain backdrop behind it
  • Build a main street with parking
  • Add the fronts/backs of N Scale buildings 
  • Add N scale vehicles and people
  • Businesses would include another FD, banks, schools, restaurants, a PD, a church, a city hall, etc
  • There should be an underground connection cut into the north end profile board showing an underground tunnel between the Federal Reserve Bank, city hall and a private bank
  • A small "Occupy" camp will be in there somewhere
Port Pacific Extension
  • Create the track plan
  • Pick up track / lumber / screws and another foam pad
  • Add this extension to the railroad on the 2nd storage cart.  It should include a small yard and a turntable.  Use the extension to stage trains on and off the main layout
  • Use building fronts at the back of the yard and have a couple of sidings back there.  This will be the town of Port Pacific
  • The layout space just needs to stay limited to a 3 1/2 foot width by the length of the interior wall of the spare bedroom including both the layout and the Port Pacific extension
  • Remove the small extension under the fire station.  The building needs to fit on the existing train table.  The layout table will not be extended for the F.D. building
Having a great time designing, building and documenting construction on my own schedule.
It'll be "done" whenever it's done.  Hopefully my skills improve as I go along.  Some sections will be rebuilt while the expansion goes on in other parts of the layout

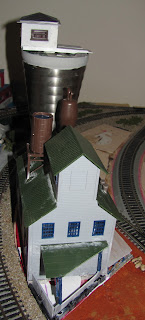
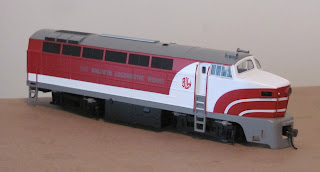
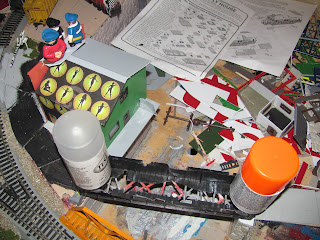
Here are a few photos of the layout as it stands right now.


Monday, January 30, 2012

Thneed Factory Detailing

Back to work on the Thneed Factory!

In testing out the parking and delivery needs of the factory I found that the small shed on the front had to go to make room for both the trufula tree shredding equipment and parking.  I removed the shed with an Xacto knife.  I then painted the driveway burnt sienna with some boulders along the sides where sidings run down the side of the property


Next I added the floor and the front wall for the shredding equipment bay on the front of the building.  I also added the foundation for the loading dock supports on the side of the building.


I then added the loading dock supports, the dock itself, and the front roof support for the shredding equipment


Next up I added a few more roof supports and the roof for the shredding equipment.  I then relocated the Onceler's condo to the rear left of the top of the factory and added a patio/deck.


I added an infinity pool, reworked the patio and painted the condo and the patio.


Next I painted the loading dock supports and front unloading hopper bumpers yellow and touched up the blue, gray and green paint on the factory.  I then used a yellow/gray for the water tower and dust collector.


Finally, I used dark green at the base of the tank with the condo on top  and dark blue at the top to contrast with the light blue pool.


I'll come back to this later for super detailing.  This will include loading dock workers, the shredding equipment, an additional building on the back with a smokestack that extends above the Onceler's condo, a helipad, vehicles and finally signs and some additional weathering.

For now, as with the Slaughterhouse that also needs superdetailing, I have used Elmer's glue to tack the building in position.  

Next time:  The Pause That Refreshes

Monday, January 23, 2012

Big Sky Blue & The Bobber


This entry covers a couple of projects.

#1 is to convert an unmarked bobber caboose to a unique Great Northern caboose.

#2 is to repaint a diesel currently letter as a demonstrator.  This will be in the Great Northern big sky blue paint scheme and will also be one of a kind.

Before:


First up was The Bobber - a 4 wheel "vintage" caboose that is pulled behind my GN 0-6-0 steam engine.  To start the project, I first separated the body from the frame.   I then added 2 additional ounces of weight to the floor.


I then painted the center of the body white - for visual interest and as a background for the decals to stand out.  I painted the door on each end white as well.


Once the paint dried enough to handle the shell I reattached it to the frame.  I used gray to add detail to the trucks, smokejack and hand rails on the sides and ends


Finally I added the decals, let them set and sprayed the car with Dullcoat to seal the paint and decals.


Next I went to work on the Big Sky Blue GN Diesel

This is a Baldwin sharknose diesel in the demonstrator paint scheme.

To change it to the GN big sky blue paint scheme, I first painted the top of the diesel down to the bottom of the side grills (and across the top of the nose) with Engine Gray.


I then painted the rest of the body down to the fuel tanks white so the blue has a good neutral undercoat.


I then added Blue Sky Blue to the bottom 1/2 of the shell and in a V shape beneath the white stripe on the nose.  After that was done I painted the fuel tanks and visible underframe in the same Engine Gray.


Decals and a coat of Gloss sealer completed the project.


Next time:  Thneed Factory Detailing

Saturday, January 21, 2012

Douglas Canal Social Club

When the Douglas Canal Social Club opens it will provide three (possibly four if you count the free service as a business!) new entertainment options for the people of Metallikahmish Bay.

The fourth business (#3 below) offers a path to safe harbor and eternal salvation for those who have run aground on the rocky shoal of sin and ill behavior.
  1. Saucy Sally's Gentlemen's Club
  2. Bull Rides $25 - Moustache Rides Free!
  3. The Metallikahmish Bay Parish of the Church of the Subgenius
  4. Three Pirates Mexican Bar & Grill
First up was to use a piece of an old O Scale coal tower as the entrance roof/base for the three pirate figures.

This was superglued to the face of the building with part of a side truss of an old HO scale bridge as its support bracket.

I then painted the green and orange walls of the building blue.


I then moved on with exterior sign work to showcase each of the businesses that make up the Douglas Canal Social Club.  I also added "neon" signs and other signage to the interior windows, blacking out what wasn't covered by signs with a Sharpie.


Once the signs were done I glued on the roof and added the plank that miscreants are forced to walk if they get out of hand.  In the history of the Douglas Canal Social Club the police have never been called.  Ever.


After a quick photo session I attached the Douglas Canal Social Club to its subfoundation.


The building is now complete except for super detailing.

I'll come back to it later and add people, a rope line to get into Saucy Sally's, railing around the deck and some tables and chairs.

This building will really gel when I get around to adding the "water" beneath the deck.

Next time:  Big Sky Blue & The Bobber

Thursday, January 5, 2012

You Need A Thneed

Back to the Onceler's Thneed factory for some additional construction.  I decided to reduce the footprint of this industry a bit.

Shrinking the factory's footprint will in turn make room for a readimix concrete plant directly behind it on the west side of the layout up the hill from the fire station.

First off I had to raise the foundation to align with the roadbed next to it for boxcar unloading.  This was done using the foundations from Mt. Vernon manufacturing (a/k/a Fireball!)

Part of reducing the lot size involves moving the chemical tank east to connect with the main factory building.  To add visual interest - and make room for the Onceler's in city townhouse on the roof - I flipped the "chemical tank" upside down.  

I then used some walls from the scrap box to surround the tank and make it part of the building.


I'd call the factory about 75% done now.  Left to do:

  • Add loading docks to the train siding and in front for trucks
  • Add a truck lift ramp for the company trucks to dump out truffula tree tops
  • Add a shell building around the ramp
  • Add a small office section to the front of the building
  • Add a car elevator with a parking pad for the Onceler's car
  • Add people, forklifts, etc, to the loading docks
  • Customize a few trucks to park out front
  • Paint and signs
Next time:  Douglas Canal Social Club


Friday, December 30, 2011

Rickety Bridge

Time to connect the roads running through the north and south portions of the layout.  To do this I modified an Atlas plate girder bridge.

For flavor I made it rickety and run down:
  • First I sliced the train tracks out of the center of the bridge
  • Then I narrowed it by 4 or 5 scale feet
  • Finally, I used a bunch of cross beams at odd angels to hold the two halves together
Once the framework of the bridge was built I installed it on a new abutment on one side and the seawall on the other.  I painted it a dark red/gray/brown blend with some red highlights for rust.

Finally, I added a few wooden planks for cars and trucks to drive across - leaving big gaping holes to see through to the water below

A fun project that gives the Douglas Canal area a lot of character.


Next time:  You Need A Thneed

Thursday, December 29, 2011

Bridge Approach

The work on the north end of the bay now is geared toward connecting the north and south sides of the bay - via a rickety old one lane bridge over the Douglas Canal.

First up was to prepare the roadway approaching the bridge.  The routing of the road makes just enough room for a small brewery in the area between the mainline and the road.  

The interior of the brewery will be used as a second fire station - with only the facade facing west to give any indication that it's another F.D.

Some pics:


Next time:  Rickety Bridge